
INSTRUCTIONS FOR INSTALLATION & OPERATION
RAMPAGE Motorcycle Unit Installation for Pick-ups
RAMPAGE is designed to provide many years of safe and reliable use. The instructions on this page are provided for informational purposes only and are not to be used for actual installation and operation. Current instructions are provided by the Manufacturer with each unit. The Manufacturer's Installation and Operation instructions should be followed carefully.
STEP 1 - Read instructions completely before starting installation paying close attention to all safety notes.
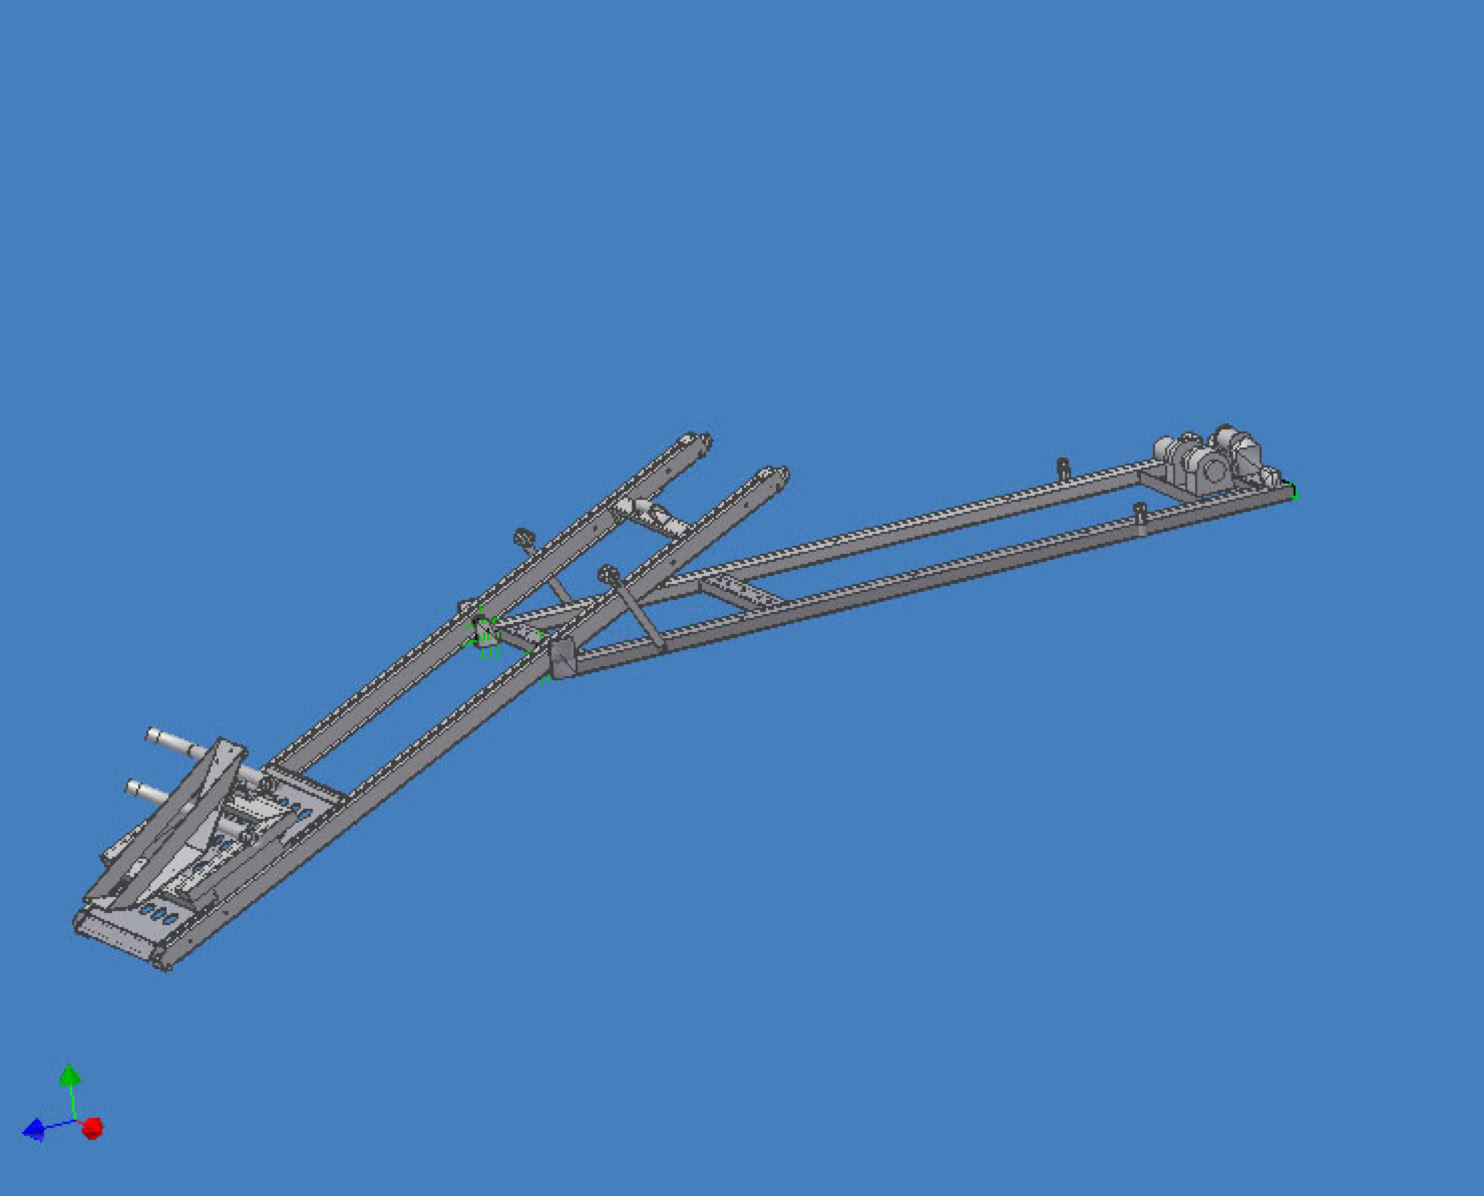
STEP 2 - Position RAMPAGE Power Ramp in bed of truck - centered left to right. Front to back location depends on length of bed - approximately 1 1/2" from pivot point . See Manufacturer's Installation Instructions for details.
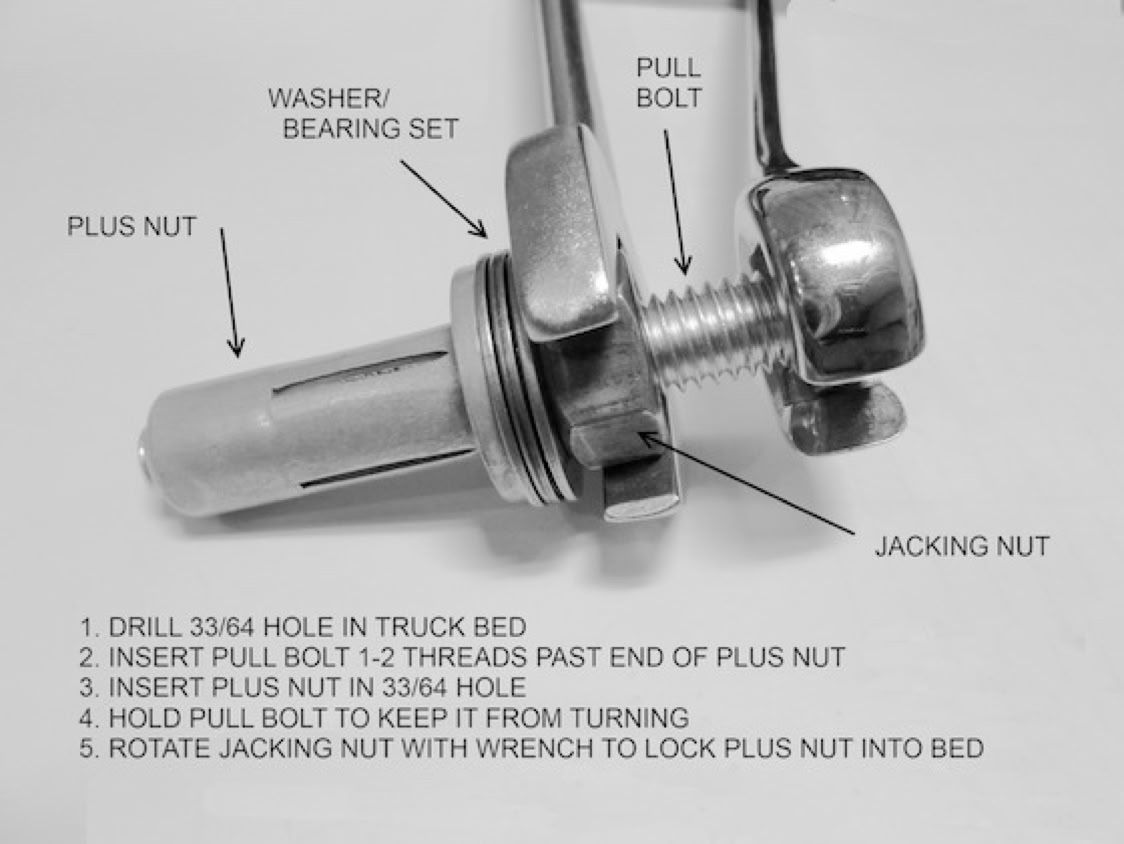
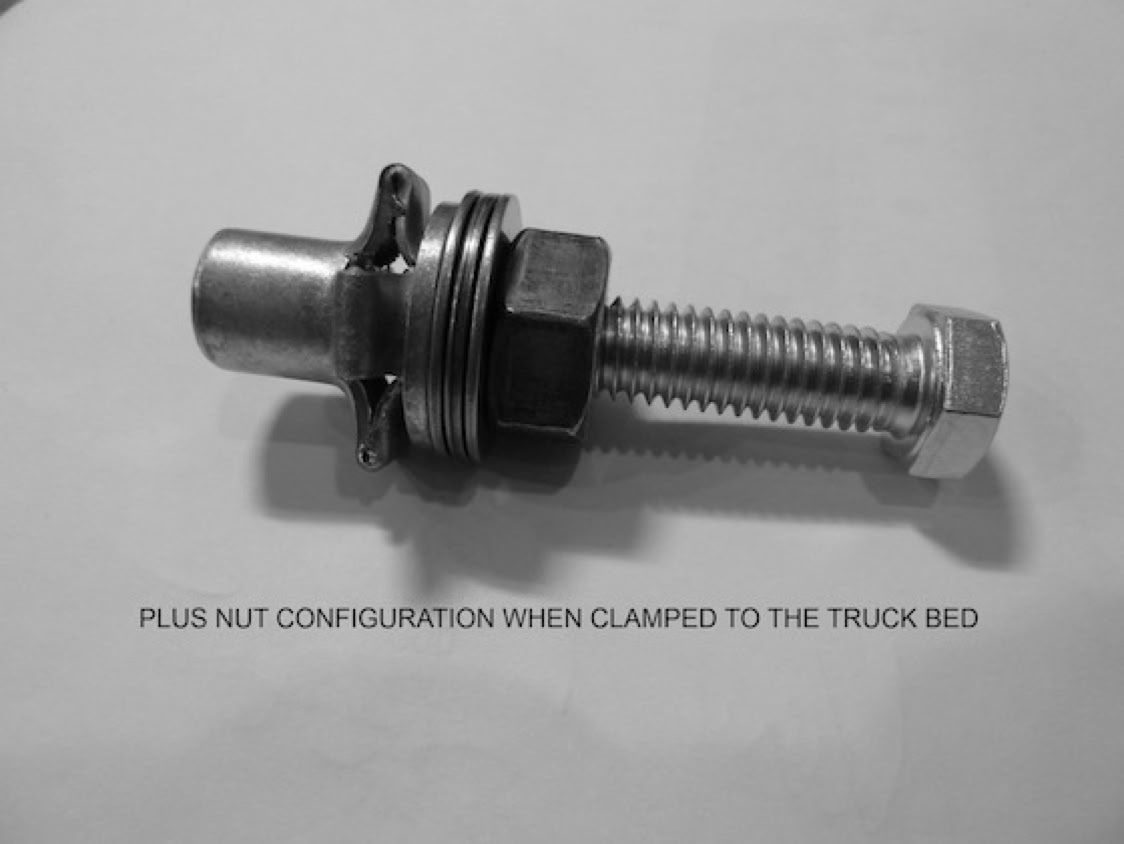
Attachment is provided by 4 high strength plusnuts that are flush mounted into truck bed with tool provided. Be careful to choose a flat surface for plusnut locations. 33/64" holes drilled for plusnuts are critical to ensure proper installation of the plusnut. Follow instructions carefully! The pre-assembled lift together with the winch motor is then attached to the plusnuts with the 3/8”-16 bolts provided. 33/64”dia. Drill bit available with 3/8” shank. $29.
STEP 3 - Locate an existing hole or stake a pocket hole in the bed of the truck and fish the power cables through to the underside of the truck. Route the all weather cable from the front of the truck bed under the cab to the truck's battery leaving the quick disconnect plug in the bed of the truck.
STEP 4 - This step is critical to ensure the safety of you and your vehicle! Disconnect battery. Then, gain access to the underside of the vehicle by supporting it on jack stands, or equivalent. Once vehicle is supported safely, route wiring to battery making sure to clear muffler, exhaust pipes, drive shaft and any sharp or potentially hot objects. Tie strap all wiring securely. Re-check all routing and tie straps.
STEP 5 - To avoid arcing, connect the positive wiring to the battery first and then the negative terminal wiring second. DO NOT ATTACH NEGATIVE TERMINAL FIRST. Tie off excess wiring in a safe place.
RAMPAGE Motorcycle Unit Operation
RAMPAGE is designed to provide many years of safe and reliable use. The instructions on this page are provided for informational purposes only and are not to be used for actual installation and operation. Current instructions are provided by the Manufacturer with each unit. The Manufacturer's Installation and Operation instructions should be followed carefully.
To Load Your Motorcycle
• Stop vehicle on level terrain.
• Check attach bolts at front and towards the rear of RAMPAGE unit to make sure they are tight.
• From the rear of the transport unit, remove the transport pin.
• From the front of the unit, insert remote control plug into the remote control socket on the solenoid.
• Check operation of the transport unit by momentarily pushing the winch power switch to the OUT position and then to the IN position.
• Push and hold the remote control switch to the OUT position. At the same time pull back on the upper frame rails until it drops down and extends to the ground. Then, pull the safety pin that locks the cradle trolley. This will allow the cradle to slide down the track and rest on the ground. Pull back on the cradle trolley lever and tilt cradle back.
WARNING - Make sure power unit towing strap is straight and not twisted.
• Pull motorcycle into cradle and tie it down to the rings on the crossbar making sure to choose a point on the frame of the bike, below the handle bars. This will ensure that you have a proper forward leaning tie-down angle to keep the bike in the cradle. Secure tie-downs loosely - just enough to hold the motorcycle straight. DO NOT TIGHTEN DOWN ON THE FORKS TO ELIMINATE SHOCK TRAVEL. THIS MAY HINDER THE CRADLE FROM CAMMING OVER.
NOTE - For Gold Wings - Choose 2 points on left and 2 points on right to tie-down front of bike. Choose points below the handle bars and use ratchet tie down straps only. Soft loops are available to protect the chrome. DO NOT TIGHTEN DOWN ON THE FORKS TO ELIMINATE SHOCK TRAVEL. THIS MAY HINDER THE CRADLE FROM CAMMING OVER. After bike is pulled into the vehicle and for added security, Bar Harness together with ratchet tie down straps may be used for transport. Bar Harness is a cup with hook that attaches to handle bars and allows faring clearance. DO NOT USE BAR HARNESS FOR FRONT TIE-DOWN WHEN PULLING INTO CRADLE OR DAMAGE TO THE HANDLE BARS MAY RESULT.
• Temporarily, place the front pin into the hole at the top of the upper frame rail and place the rear pin through the upper frame rail and under the trolley cradle at the highest and closet position to the front of the cradle. This will hold the bike in position as well as preventing it from rolling up the rail. Now, push the remote switch to the IN position until the cradle cams over and locks. Remove both pins.
• Push the remote control switch to the IN position. This will start the transport unit pulling the motorcycle up the ramp. Once the trolley cradle is up to the top of the rail, insert the front pin and clip.
WARNING - Tailpipe and rear fenders are the low points. As you load, check for adequate ground clearance at these low points. If clearance is minimal, an optional portable ramp is available to lower angle of ascent.
• Now, push the remote control switch in the IN position until your motorcycle is pulled completely into the vehicle.
• Insert the transport safety pin after the unit has stopped and is pulled fully into the vehicle.
• Tie-off the motorcycle to the sides of truck with 4 additional tiedowns - 2 at front and 2 at rear. DO NOT LOOSEN THE TIE-DOWNS USED FOR LOADING AND UNLOADING. THIS MAY ALLOW TOO MUCH SLACK WHEN UNLOADING AND MAY RISK DAMAGE TO YOUR BIKE.
To Unload Your Motorcycle
• Stop vehicle on level terrain.
• Remove tie-down straps that secure the motorcycle to the sides of the truck.
• From the rear of the transport unit, remove the transport safety pin.
WARNING - Make sure power unit toe strap is securely attached to front cradle. This strap must be kept tight at all times during loading and unloading. If power unit tow strap is not securely attached, damage to the motorcycle and/or personal injury may result.
• Make sure front tie downs are tight enough to hold bike upright.
• From the front, insert the remote control plug into remote control socket.
• Push the remote control to OUT position, while giving a pull on your motorcycle to start the outward motion. Hold the remote control switch in the OUT position until the unit is fully extended.
• Remove the trolley cradle pin and continue to lower the unit to the ground, releasing the trolley cradle lever to allow front tire to continue to the ground.
WARNING - NEVER allow any slack in the winch strap when starting the motorcycle down
• Unhook the motorcycle from tie down straps. Unhook strap opposite kick stand first to allow motorcycle to come down on kick stand.
• Back the motorcycle up a few feet.
• Push the remote control switch to the IN position to pull the transport bunk back into the vehicle and into the transport position, inserting trolley cradle pin and clip as well as transport safety pin and clip.
Questions/Order CALL
530.913.2020 or email
All items © Copyright. Piper Sport Racks,, All Rights reserved